Centrix R52 Release Notes
- Robert Hunt (Unlicensed)
- Former user (Deleted)
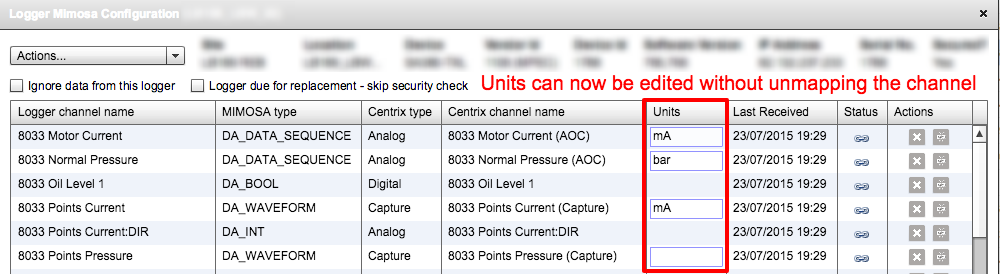
Edit units without unmapping channels
When editing the MIMOSA configuration of an SA380 TX/TXL the "units" of a channel can now be edited without having to unmap the channel first.
Capture Trace Episodes
Capture trace episodes can now be created through a new HTML interface in Centrix. From the dashboard you can access the captures page from the menu item Captures > Capture Episodes.
When you enter the page you'll need to first need select a site from the drop down list. Once you have selected a site, the channel drop down list will be populated with any available capture channels on the site, this will typically be channels representing current or pressure for points. After selecting a capture channel you will see a list of capture traces in the table below.
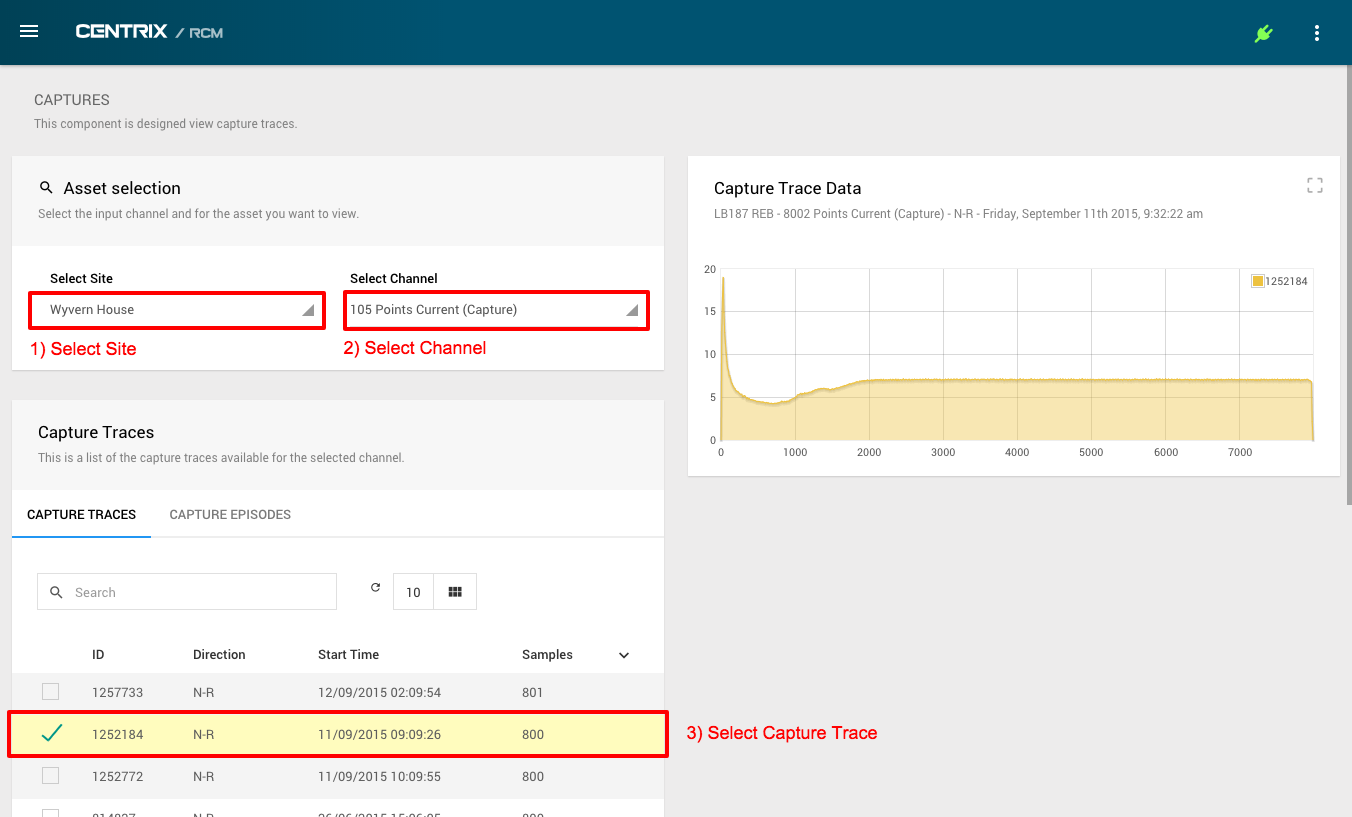
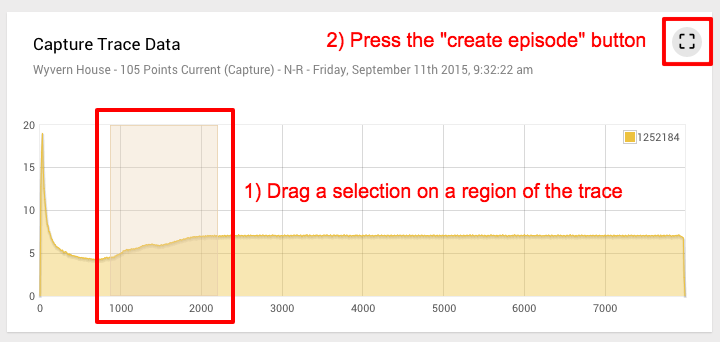
Once you select a capture trace you will see the chart populate with the data on the right. To create an episode drag a selection on the chart which represents the region you're interested in. Press the "create episode" button in the top right of the chart to create the episode.
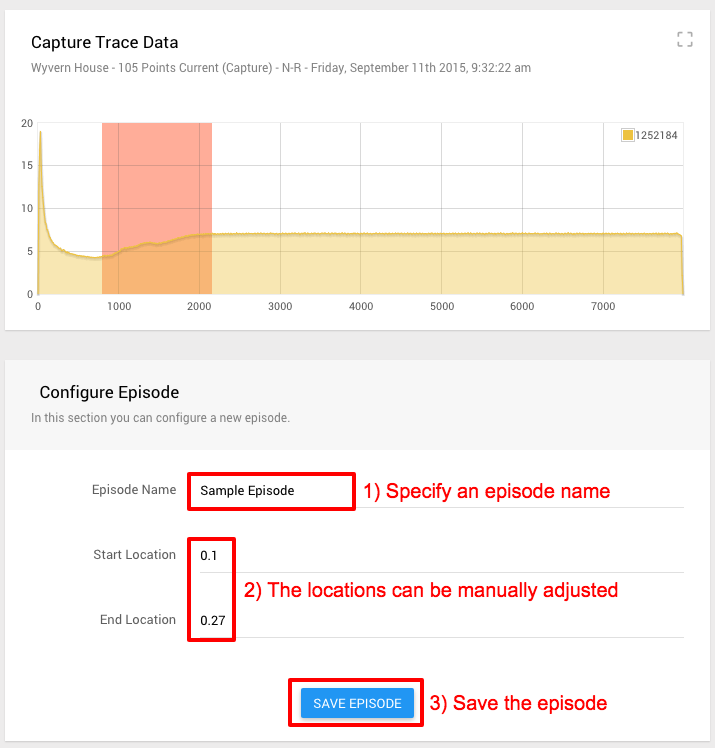
A "Configure Episode" section will appear below the chart where you can specify a name for the episode. You can also manually tweak the start and end locations by using the number fields, the chart will update in response to the changes. Once you're happy with the episode press the "Save Episode" button to save the episode.
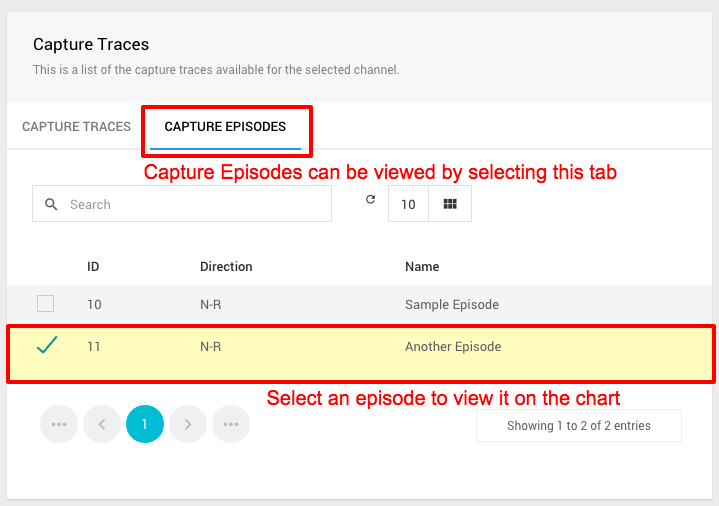
Existing episodes for a specific capture channel can be viewed by going to the "Capture Episodes" tab on table located on the left side of the page. Selecting an episode from the table will display it on the chart with it's associated trace, the episode can also be edited.
To make use of the episodes when training a points alert simply select it from the drop down list. During the training process the historical traces are searched for the region which best matches the selected episode, this can be used to improve the accuracy of the points alert by targeting specific features of the trace.
