SA380TX Master with SA380TX-L & VTi21 Slaves using RS485
- Mark Lock
- Mark Beeson (Deactivated)
- Janos Vaczi (Unlicensed)
Overview
This guide describes how to connect a master slave network of loggers.
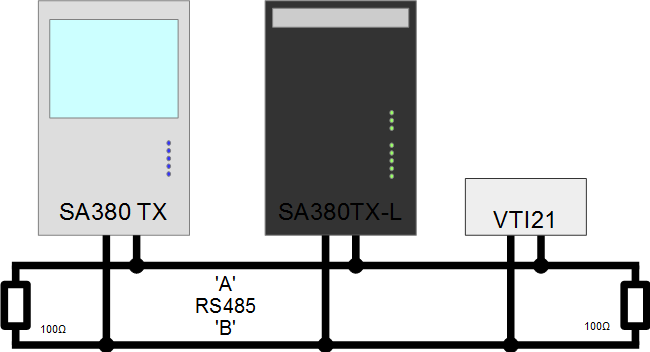
- An SA380TX is the master logger.
- loggers are connected together using RS485.
- Up to 7 devices can be slaved from a single SA380TX.
- The TX can scan the bus on demand to auto-detect slaves.
- Each slave device is identified by a unique identifier.
For correct operation it is important to arrange the slave units at consecutive places in the TX logger. If there is a gap in slave units or the first slave unit is missing, please remove all slaves units on the touch-screen (or simply revert the config to default), restart the TX master logger and start configuring the slave units starting slave #1.
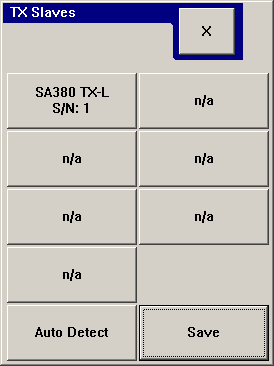
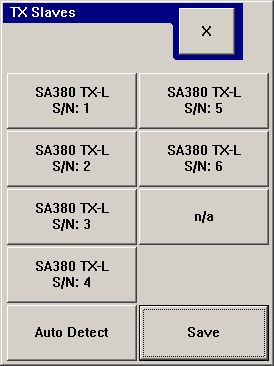
Example of incorrect configuration:
 notice that the first slave position (top left) is n/a. The first slave is configured to place #2. This is incorrect.
Simplest way to make sure the configuration will build correctly is to start the configuration from scratch:
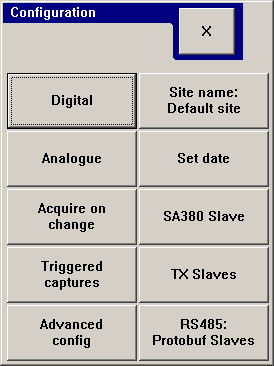 go to advanced config:
 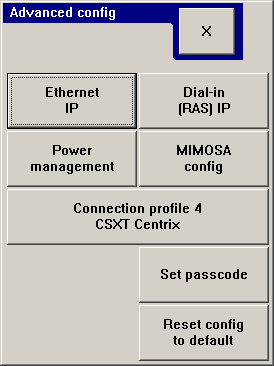 Press "Reset config to default":
 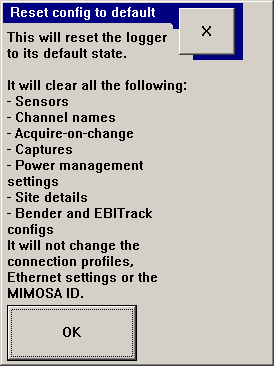 Press OK will restart the logger:
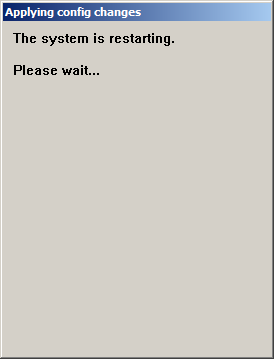
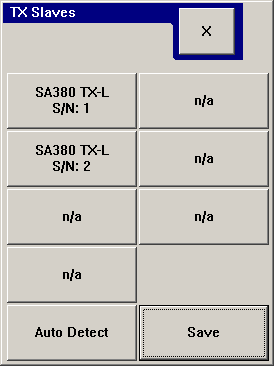
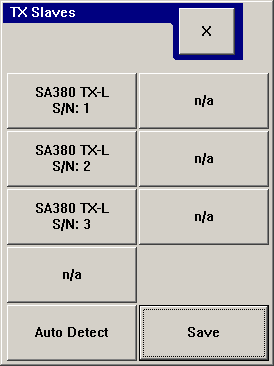
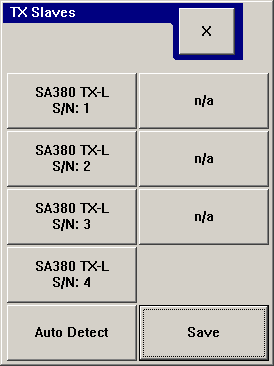
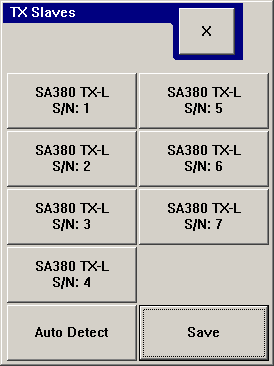
Correct slave order:

As of version 1164, the above screens look slightly different. In the list of slave units, the first slave position (top left) is now reserved for the "Master" (the TX logger itself). References on the user interface to "Protobuf Slaves" have also been replaced with "MPEC Slaves" for clarity.
Connection Arrangement
Configuring an SA380TX-L as a slave logger
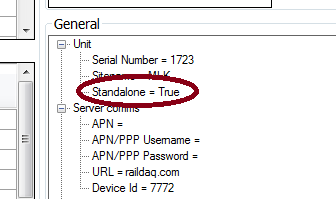
Un-check the "Standalone" button in the TX-L's web config.
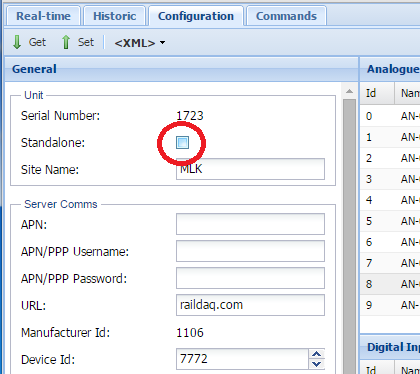
- For older loggers which don't have web config installed, using dPanel Desktop this can be achieved as below:
Configuring a VTi21 as a Slave Device
The VTI21 does not require any configuration to instruct it to become a slave device. It is always a slave device. However, additional SA380TX configuration is required to adjust the behaviour of the VTi21.
SA380TX configuration
The SA380TX is configured using the following sequence of dialogues
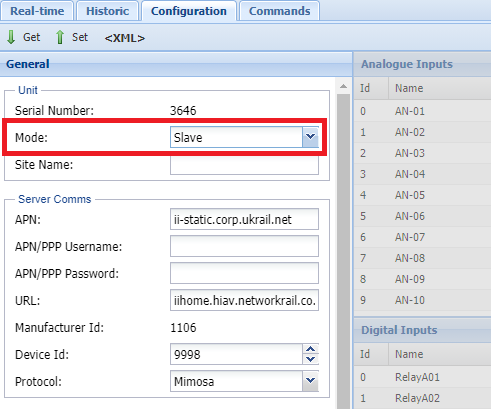
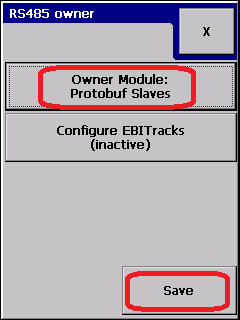
- Enter the configuration screen

- Set the RS485 port for use with protobuf slaves:

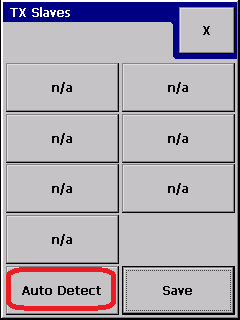
- Ask the logger to auto-detect connected slave units. This will take approximately 10 seconds.

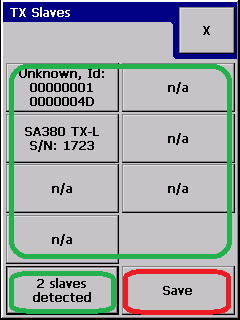
- review the connected slave units. Each unit is dispayed on its own button which will contain the slave type when known, and the units serial number. In the example below, the first unit is of unknown type, and the second is a slave SA380TX-L. The MPEC slave system automatically allocates channels and input types, so it is not necessary for complete slave type identification.

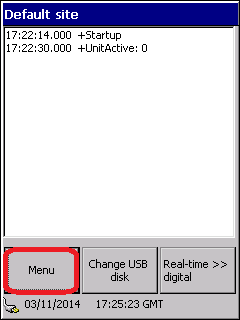
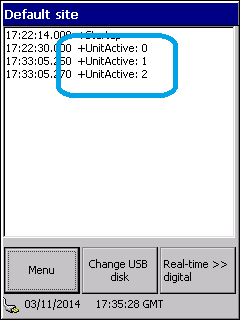
- Verify that the logger is connected to them. Each logger will be shown connected with the "+UnitActive: X" moniker where the X represents the logger number. Logger "0" is the SA380TX master.
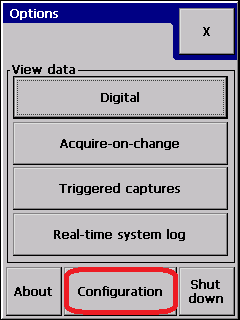
Confirmation using the About Box
The about box can be used to display the status of slave loggers. This can be reached as follows:
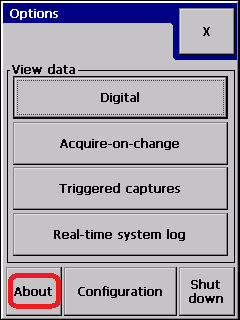
This will bring up the about window which can give useful and immediate diagnostic information.
Loggers Connected Normally
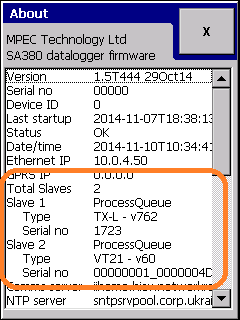
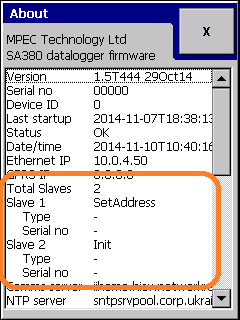
The highlighted section shows master slave information, the number of slaves attached, their types and serial numbers. The communication state is also displayed against the slave number. This will iterate through a number of connection states. The following images show some typical failure states
All loggers disconnected
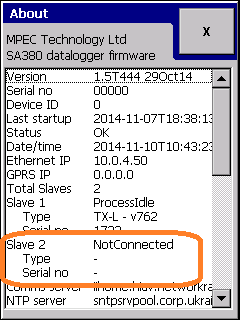
One logger is disconnected
Related articles