SA380 Centrix Push Configuration versions prior to 4.0.9
Introduction
SA380s with firmware versions >= 4.0.0 (Feb 2015) have the ability to push data directly to Centrix over either Ethernet or GPRS. The following procedure shows how to configure the logger.
Step-by-step guide
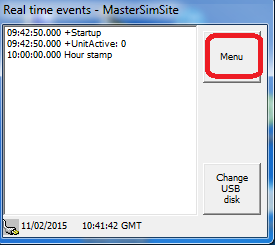
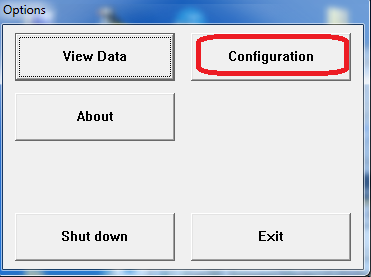
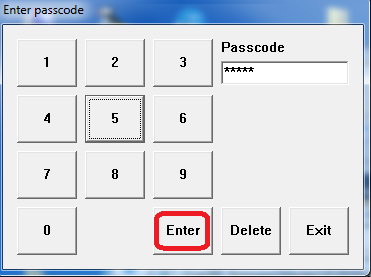
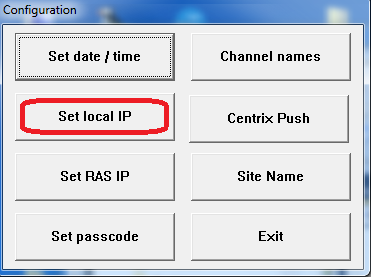
Configuration is performed using the "Centrix Push" configuration dialogue which is accessed as follows:
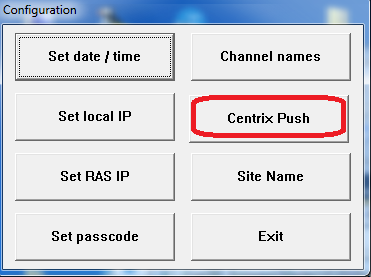
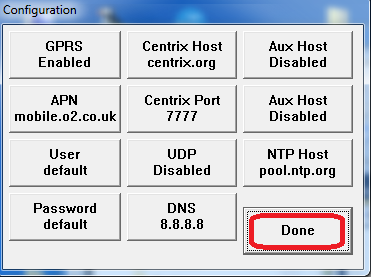
The centrix configuration dialogue contains several configuration elements, which are described below. The factory defaults are as below:

1) Configure the connection method:
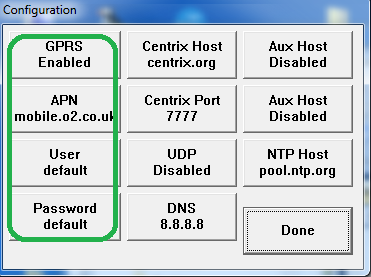
This panel contains the settings for a GPRS connection. The GPRS button will toggle whether GPRS is enabled, or disabled. When enabled, the APN, User and Passwords fields are available for editing. These must be set correctly for the logger to establish a connection to the internet. To use, for example, the UK O2 network, these would commonly (depending upon SIM and tariff) be set to "mobile.o2.co.uk", "default" and "default" respectively.
2) Configure the Centrix server in use:
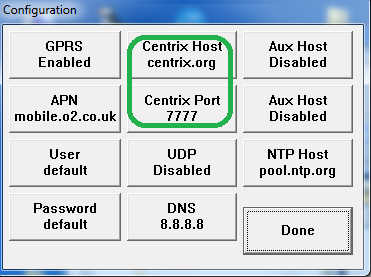
The factory defaults have the centrix disabled. Centrix push is disabled by setting the "Centrix Port" to 0, to enable it, set the "Centrix Port" to "7777", and the "Centrix Host" to "centrix.org". With some installations, MPEC may ask you to connect loggers to our test system which is located on "raildaq.com", or use an alternate port.
3) configure a DNS server
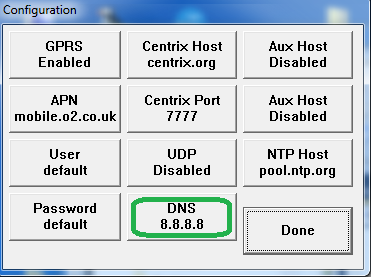
The DNS server is required for use with Ethernet connected loggers. The factory default (8.8.8.8) points to one of Google's publicly available name-servers and will work in most circumstances. When a GPRS connection is being used, the mobile network may override this setting.
4) configure a time server
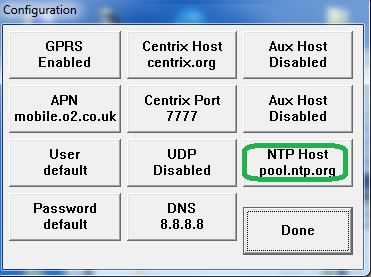
The logger will automatically obtain its time from the internet using SNTP. To do this it requires a time server, which is configured using the "NTP Host" button. The factory default "pool.ntp.org" will suffice in most circumstances, but may be overridden by settings in the centrix server once a connection has been made by the logger.
5) Other settings

The options for UDP connection and an Auxiliary host are provided for alternate purposes, and are not covered by this document. For current installations unless given instruction to the contrary by MPEC, they should be as above (disabled, by setting the port to zero).
6) Press "Done" to save your "Centrix push" settings.
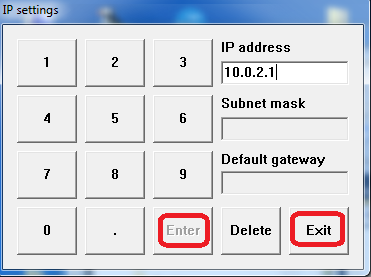
7) Ethernet configuration
If you are using ethernet, set your IP address using the "Set local IP" dialogue (see manual for further details):
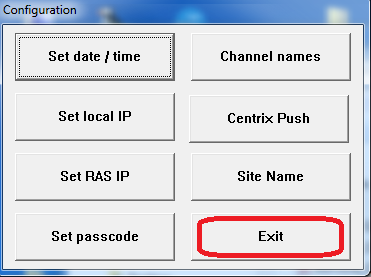
8) Exit the configuration dialogue
Verification of Centrix connection
On Centrix
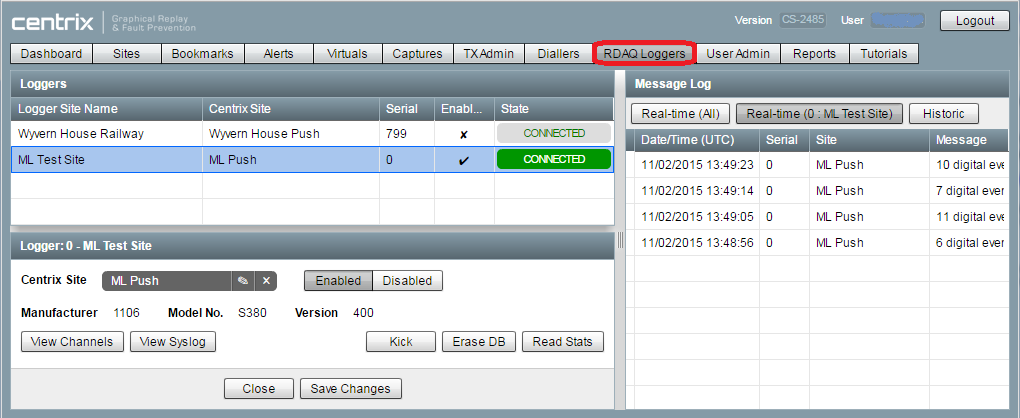
The centrix connected loggers can be found under the "RDAQ Loggers" tab, as shown below:
On the Logger
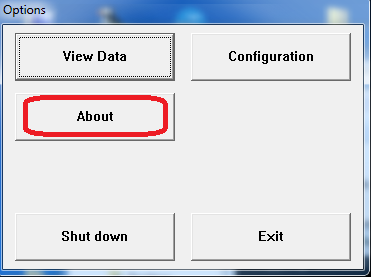
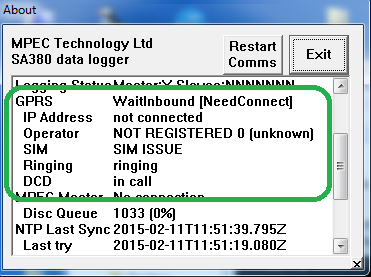
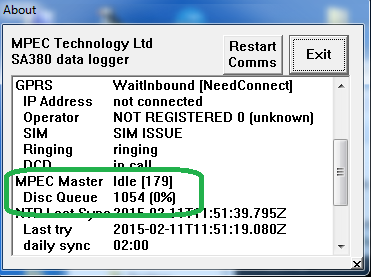
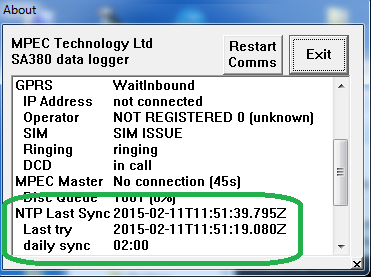
The about box display contains various information on the connection to the centrix server. This is accessed as follows:
Logger version information:
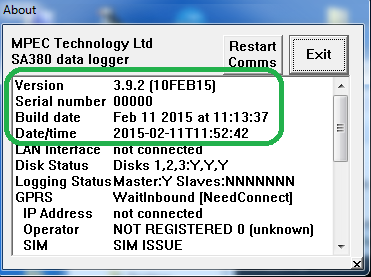
GPRS Connection information:
Centrix connection information
SNTP time synchronization
Related articles