SA380 TX Connection Profile configuration
- Janos Vaczi (Unlicensed)
- Mark Beeson (Deactivated)
- Former user (Deleted)
Introduction
The connection profile decides how the logger tries to communicate with the outside world.
The SA380-TX logger is capable of sending the acquired data events to a specified server.
When you need:
- The logger to send data to a server,
- Listen for dialup connections,
- Use cellular GSM communication
Then you need to set an appropriate connection profile in the data logger.
There can be maximum of 10 connection profiles defined in the logger.
The connection profile describes:
- Primary connection for the server communication: Ethernet or GPRS. (The selection "GPRS" refers to all forms of cellular modem connection, be it 2G, 3G or 4G).
- For GPRS/3G/4G: APN name and PPP credentials: username and password.
- Server name where the logger will send the data events.
GUI setup
Navigating to Connection profile configuration
The logger’s master dialog displays the digital events (state changes) since startup.
The buttons let the user to:
- Enter the menu: you can read historic data, system log or set configuration.
- Remove a USB stick in a controlled way. Failing to indicate the removal first, the logger reports error and restarts.
- Display real-time states of the inputs.
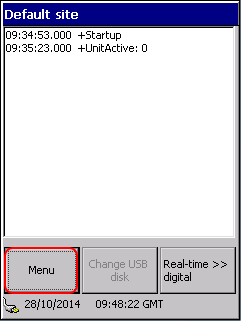
Let’s enter the Menu:
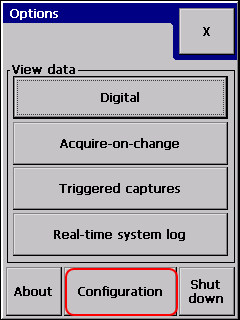
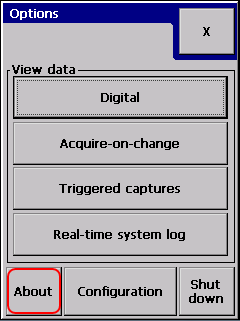
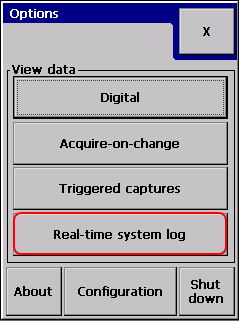
Options menu lets the user to display historic data stored in the logger.
The About box shows useful information about the logger like: firmware version, GSM modem state, last read GSM signal strength, Ethernet IP address, etc.
The Configuration button brings to logger configuration:
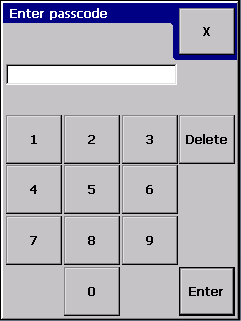
Before letting the user to display or change the configuration, the user has to be authenticated.
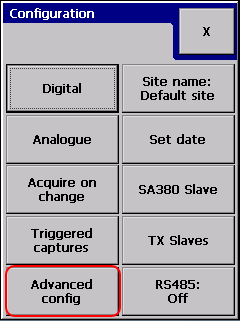
The first configuration page lets the user to change mostly data related settings: channel names, analogue sensors, analogue measurement methods.
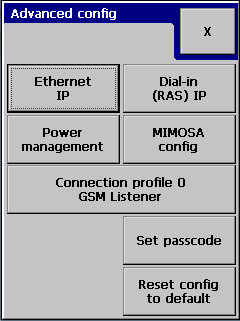
The Connection profile is not related to the input, so it is placed in the Advanced configuration section:
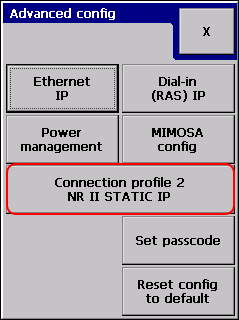
Shows the active connection profile name. To change or review the connection configuration you have to press the button:
The active profile is highlighted. There is always an active profile present in the logger.
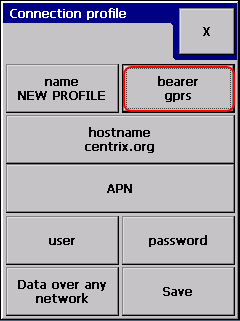
Creating a new connection profile
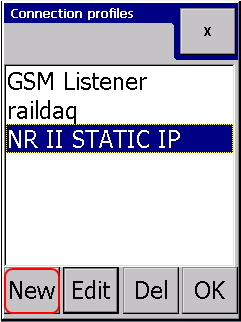
Selecting new shows a blank connection profile:

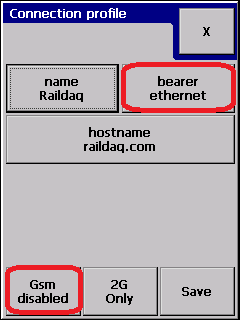
The two most important settings are:
- Name of the profile
- (Server) host name where the data events will be sent
Ethernet primary connection

The only thing left to decide whether we let the GSM modem to operate. When the modem is:
- Enabled: if the unit has an active SIM card with a data number, it can be called with dialup connection. Remote caller can retrieve data from the logger and can change configuration.
- Disabled: The modem is completely powered off. This is option for environment where the GSM signal would generate unacceptable noise to other systems.
Press Save when finished.
Ethernet only connection
To disable the modem make sure the Gsm disabled button is active. (Power off)
Press Save when finished.
GPRS primary connection
Selecting GPRS will assume three more settings:
- APN: Access Point Name is the gateway between the GPRS / 3G / 4G network and another computer network.
- Username: needed for the point-to-point connection to the APN (it may be blank)
- Password: needed for the point-to-point connection to the APN (it may be blank)
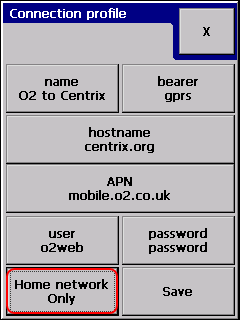
Toggling “Data over any network” button switches between enable and disable data roaming.
When “Home network only” is selected the logger will disconnect from the network and will try re-connect to the network the SIM card belongs to.
Press Save when finished.
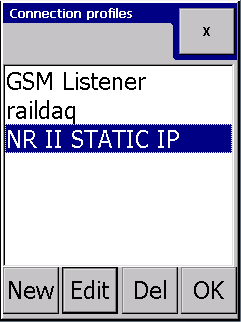
Selecting active connection profile

In the connection profile selector dialog: simply highlight the new profile and press "OK" button.
This will bring back to Advanced config dialog. The new active profile name will show on the Connection profile button.
Changing configuration remotely
Since firmware 1.5, there is a web based configuration tool available on the logger.
You have to reach the logger with a browser again:
The logger will ask for authentication:
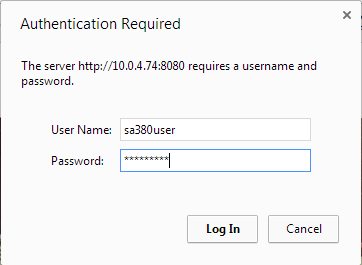
User name and password are the same.
Go to config:

After a short while you have to able to see the config editor:
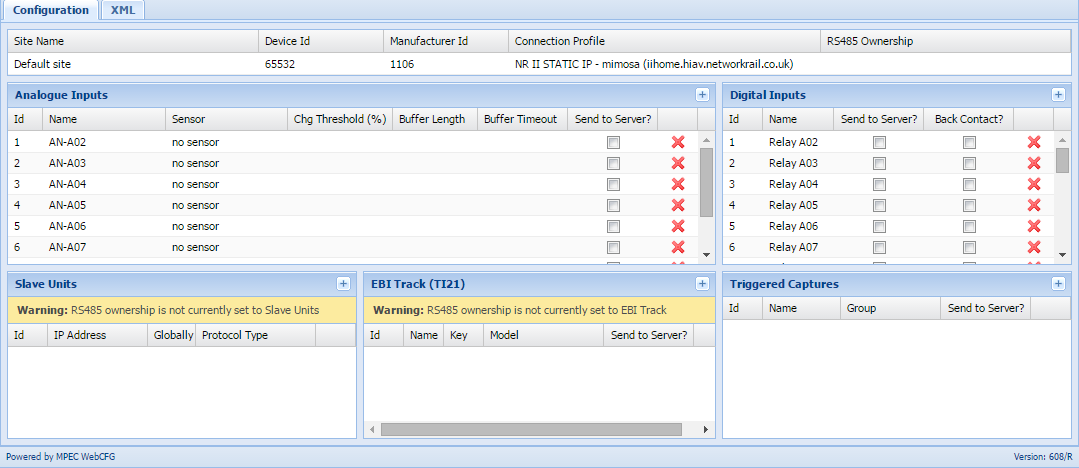
As connection profile configuration is only available for advanced users, you can edit in XML form only (at the moment):

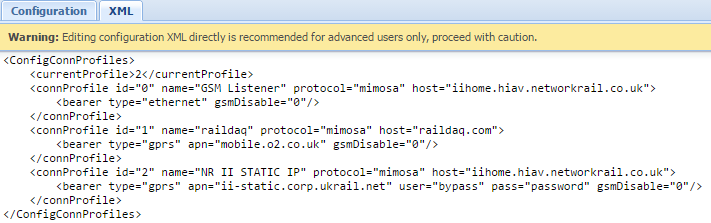
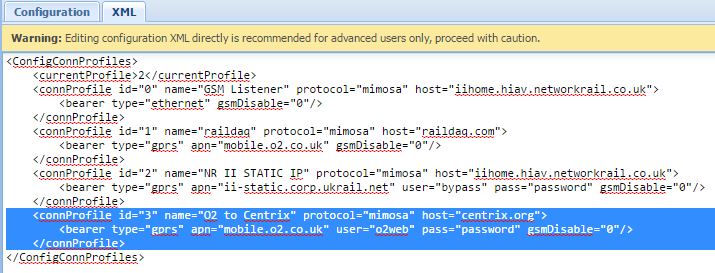
Simplest way on creating new connection profile is to copy and edit one of the existing profiles:
You have to change:
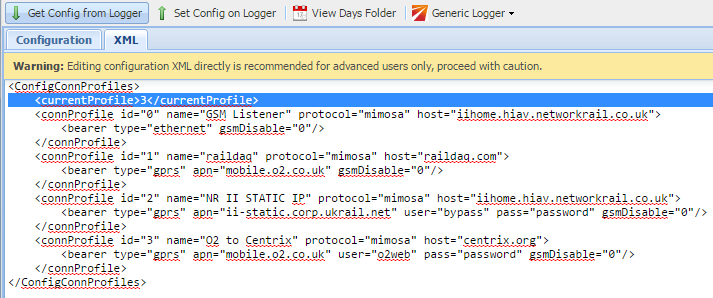
id: easiest to increment the last available id by 1, for above id="3"
name: create a new name for the new profile: name="O2 to Centrix"
host: e.g: host="centrix.org"
GPRS / 3G / 4G example:
apn="mobile.o2.co.uk"
user="o2web"
pass="password"
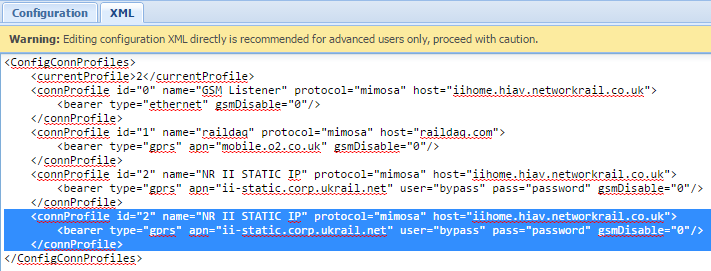
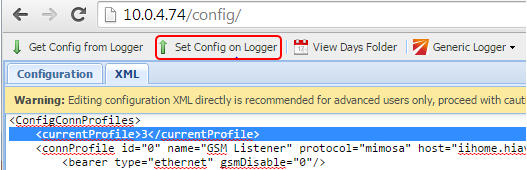
Press Set Config on Logger when finished:
Troubleshooting
About box
Navigate to the About box:

Scroll down to the bottom:
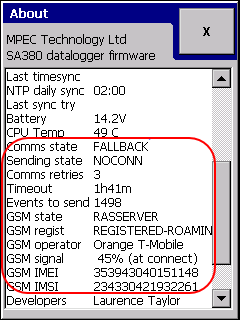
Comms state: data event sender routine state. In case of any error it usually shows FALLBACK. In FALLBACK state the logger waits for the Timeout displayed below and retries the last operation.
Error free communication usually shows NOTIFYSAMPLES or LOOPWAIT states.
Sending state: sub-state of the Comms state to indicate lower level errors. Normally shows IDLE or OK. May be useful for for more thorough investigation.
Comms retries: number of times the logger attempted to send the current message to the server.
Timeout: time the logger waits before retrying to send the same message to the server.
Events to send: number of events waiting to be sent.
GSM state: RASSERVER: Remote Access Server is running, basically we can call the logger, there is no active cellular connection.
PPP: GPRS / 3G / 4G connection is active. We can reach the logger remotely either using the GPRS IP address if it is routed or we can call the logger on the data number.
The following parameters are retrieved only at modem startup:
GSM registration: Shows whether the modem managed to register to any GSM networks. (Usual states: NOTREGISTERED, REGISTERED-HOME, REGISTERED-ROAMING)
GSM operator: Network the modem managed to register to.
GSM signal displays a percentage value proportional to -109 .. -51 dBm range. -109dBm = 0%. -51dBm = 100%.
GSM IMEI: International Mobile Station Equipment Identity: identifies the modem.
GSM IMSI: International Mobile Subscriber Identity: Identifies the SIM card.
When we have a working configuration and working communication:
Comms state: NOTIFYSAMPLES or LOOPWAIT
Sending state: IDLE or OK
GSM state: RASSERVER for dialup-only or PPP for GPRS / 3G / 4G connection
System log
Real-time system log
Navigate to real-time syslog screen:
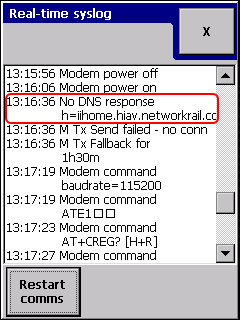
The Real-time syslog dialog shows the important system events as they happen in real-time.
It takes a little practice to be able to filter out the communication related information from the system log,
but it gives the sequence of events which may help to rectify communication related issues.
"Restart comms" button forces the GSM modem handler and the data event sender modules to restart.
The example above shows that the DNS server could not resolve the host name iihome.hiav.networkrail.co.uk,
which tells us we are most likely to talk to wrong DNS server, maybe connected the wrong network.
Remote system log
The real-time syslog gives an easy access to the system log and shows the events as they happen in real-time.
This might be too fast to follow on the limited sized screen. The real-time syslog dialog is not available remotely either.
In this case you may want to retrieve the syslog remotely.
Open a browser and enter the logger's IP address:

The logger will ask for authentication:
User name and password are the same.
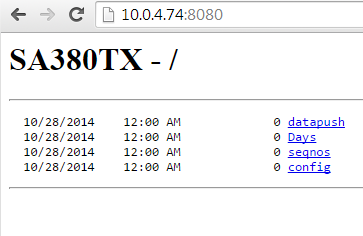
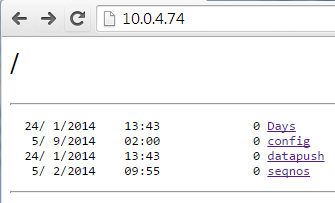
The logged data is organised in the Days folder:
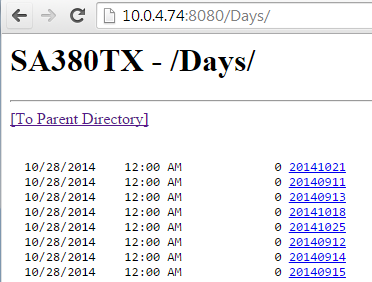
Look for the particular date e.g. 28 Oct 2014:
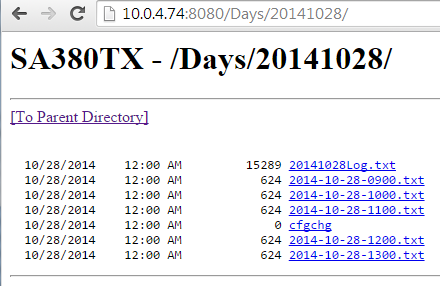
Syslog is available in 20141028Log.txt:
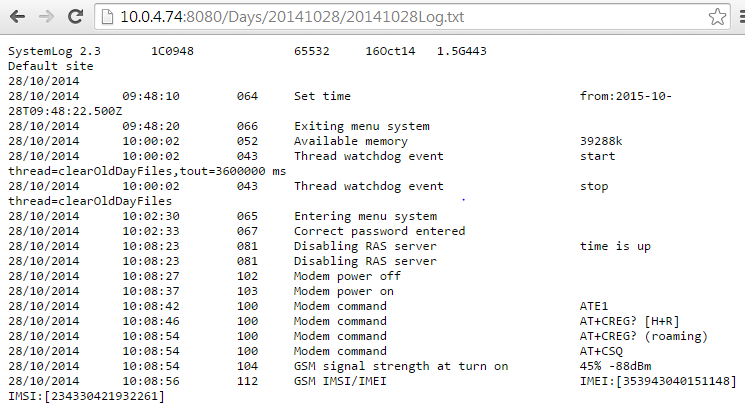
It is the same output as we get on the real-time syslog dialog.
Related articles