SA380TX Local Access
- Martyn Emmett (Unlicensed)
- Nathan Howard (Unlicensed)
This section describes how to use the touchscreen to configure the logger and access data.
In normal operation, the touchscreen shows real-time input changes.
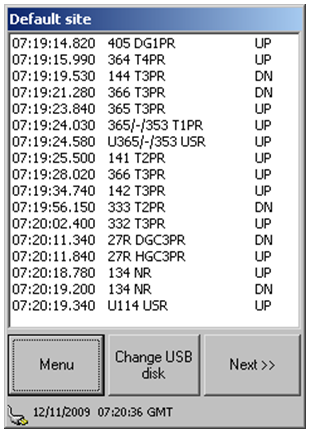
A mains / battery icon is shown at the bottom left of the screen. This has the following states:
Mains power connected: 
Mains power disconnected - running on battery: 
How to view stored data
Press the “Menu” button. The following screen is displayed.
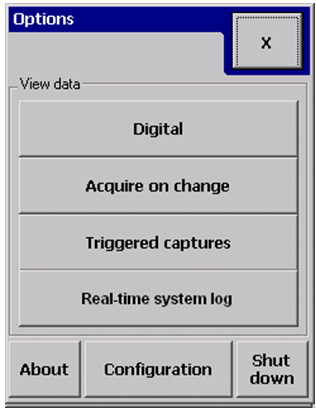
Press the “Digital” button.

This screen shows all the days of data currently stored on the logger.
Selecting one of the days brings up the following screen:
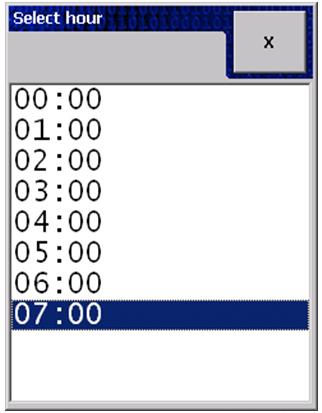
All files currently available for the selected day are shown.
Selecting one of the hour files brings up the following screen:
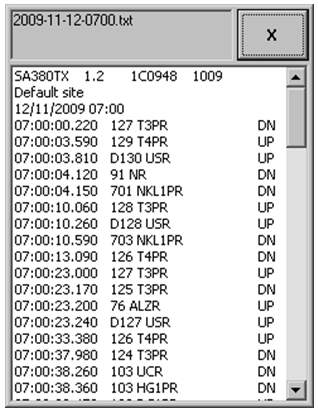
Use the scrollbar buttons to scroll up and down the data. You may need a tool to do this as the buttons are small.
Avoid using sharp objects such as screwdriver blades or the point of a pen as these will damage the touchscreen. The back of a pen is ideal.
Use the same procedure to view detailed acquire-on-change and triggered capture data.
The real-time system log records useful diagnostic information about the state of the datalogger itself.
How to change an external USB disk
You can insert a new USB disk at any time. The logger will beep twice to acknowledge the new disk and begin logging to it immediately.
However, before removing a disk you must follow these instructions.
Important:
Removing a USB disk without following these instructions can result in corrupt data and system instability.
This is because the logger may be in the middle of writing to the disk when you remove it.
On the main screen, press “Change USB disk”.
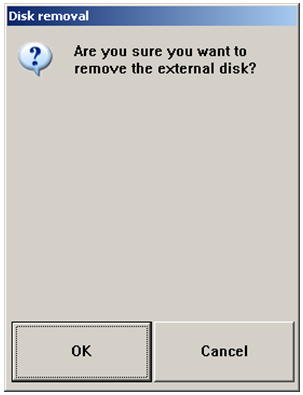
Press “OK”. The following screen will be displayed:
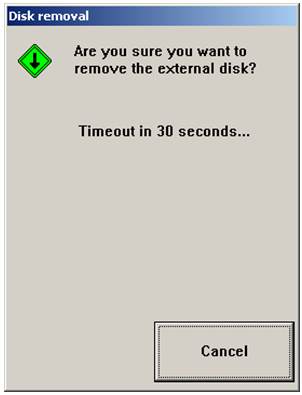
Remove the disk. The logger will prompt you to insert a new one.
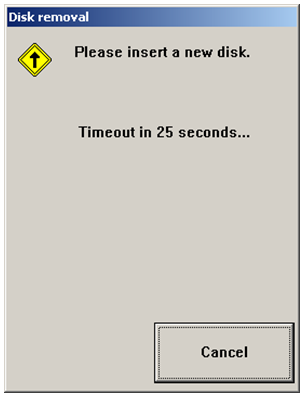
When a new disk is inserted, the logger should beep twice and return to the Real Time Events screen.
If you do not insert a new disk, the SA380TX will carry on logging to its internal disk.
How to set the system date and time
Navigate to:
Menu..Configuration [enter security code]..Set Date
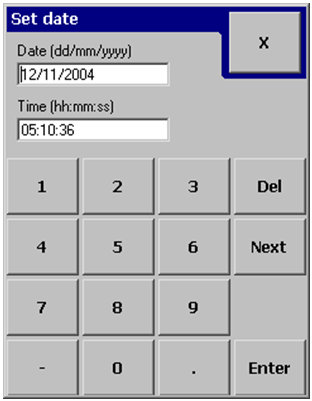
Fill in the correct date and time and press Enter. "/" and ":" characters are entered automatically as you type. Note that the year must be entered in full (eg 2009).
How to change the IP address
Navigate to:
Menu..Configuration [enter security code]..Advanced config..Ethernet IP
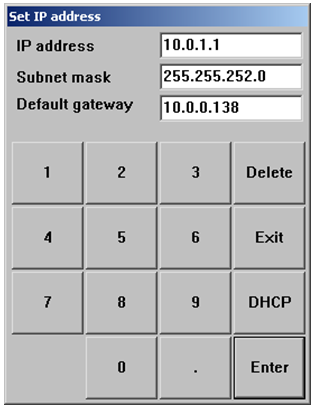
Press the Delete button to delete the existing address and use the keypad to enter a new one.
Some notes about IP addresses
The two important addresses are the IP address and the subnet mask. In order to get the logger to work correctly on a network:
- The subnet mask must be the same as the other computers on the network
- The IP address must be unique, ie it must be different to all other computers on the network.
The gateway should be set to the gateway on the subnet. Your system administrator will be able to provide this. If the logger is not on a network (ie it is only being used for direct cable connection), just leave the gateway set to 10.0.0.138.
See also “Direct cable connection”.
How to set the local pass code
Note that:
Be careful when changing this. If the pass code is forgotten, the logger can only be unlocked by the manufacturer.
Navigate to:
Menu..Configuration [enter security code]..Advanced config..Set passcode

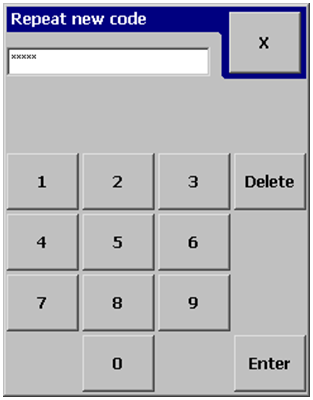
Enter a new five-digit pass code in the Passcode box, then repeat it in the Confirm box. Pressing Enter changes the code permanently.
How to shut the logger down safely
Press Menu and then “Shut Down”. The following dialog is displayed.
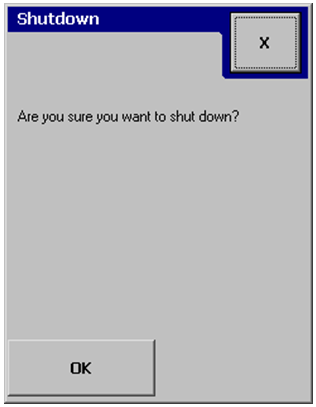
Press OK. The following dialog boxes will be displayed.
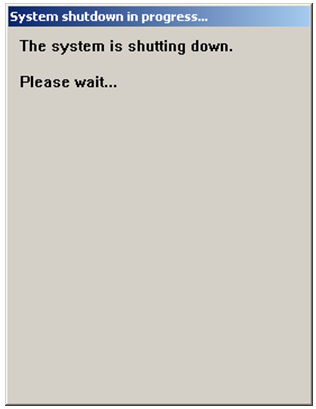
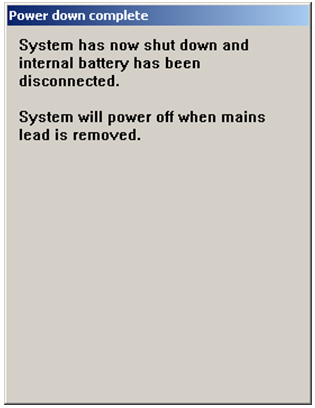
Once this dialog is displayed, remove the mains lead or disconnect the fuse to power down the system.
To reboot the system, leave the mains lead and fuse connected once the dialog is displayed and wait around 2 minutes.
Hard reset shutdown
Note that:
This can result in system instability and corruption of data and should only be used as a last resort.
If all else fails, the logger can be shut down by removing the mains cable and pressing reset.
The reset button is behind a small hole on the base of the unit next to the Ethernet port.
Use a paperclip or similar metal object to press the button.